Thursday, December 18, 2014

TOPIARY SILVER-METALLIC HOLIDAY TREE

I love shiny things- and who doesn't. Let me show you a fun and creative way to make a silver-metallic topiary holiday tree. 

Topiary Holiday Tree - Handmade

I saw one of these little ones the other day at Michael's and I think it was around $25, so I thought to myself "I can make this" and as it turned out I can, and made it even bigger. 

While at Good Will I came across the topiary top only. The bottom, or the pot, was missing so I went ahead and picked it up along with a very heavy pot to go with it.

Here's a list of other items that I got:

Krylon metallic spray 
Silver ribbon
Silver ornaments of different shades. 
Silver garland 
Hot glue gun
Pine cones - different sizes are OK
Black sheer ribbon
Dry moss
Square Styrofoam


Silver spray painted pot

1. First thing I did was used the metallic spray and spray-painted the heavy pot, as well as the pine cones that I picked from my back yard. It only takes minutes before it dries. I would recommend that this be done outside because of the strong fumes. 

2. While the pot and pine cone dried I removed what was already on the topiary top and cleaned it off. 


Silver spray painted pine cones


Topiary Tree


Topiary Tree- bare


3. Using the hot glue gun I glued the silver ribbon on the trunk of the topiary top/ball and placed it into the square Styrofoam, then glued the entire thing into the spray painted pot. I then glued the dry moss and decorated the bottom of the trunk with ornaments and pine cones. 

4. I used a small

amount of sheer black ribbon and tied a couple of pine cones to the ribbon and then to the ball. 

5. Start decorating by gluing the ornaments and sliver freshly painted pine cones randomly on the ball.

Decorate topiary tree with ornaments. 
6. After using up all the ornaments and pine cones I placed the silver garland in between those, covering any sport of the  topiary top, and hot gluing it down. 


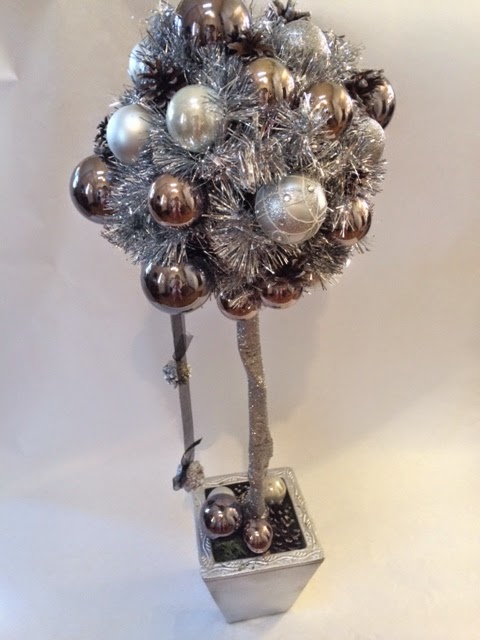
Topiary holiday tree- silver, handmade

In the end I was left with this gorgeous, handmade, silver and shiny, metallic tree which I am proudly displaying in the living room. 


Paper Christmas Tree ~ Super cute decoration and a fun project to make


Paper Christmas Tree with ornaments


My kids absolutely enjoy crafting, and making things that they could proudly display. During holidays, in particular, we make a lot of things to hang, display and gift. One of the things we decided to make this year was paper Christmas trees and they turned out absolutely lovely.


Here's a list of things we used (you may use other or different decorations or colored paper):

- Thick green construction paper (cut into piles of different sizes- we did 6" down to 1" but there is no    need to be precise)
- Shish kabob wooden skewers (careful with these especially if you have really young ones as the top      is very pointy and poky)
- Square Styrofoam 
- Small ornaments 
- Decorative tape
- Glitter
- Glue
- Snow spray
- Rhinestones 
- Foam core board (used only for the star, you may use something different or make a start out of       aluminum foil)

Exiting thing, about these items you need, is that most all of them could be found at your local dollar store. 

1.Start by sticking the shish kabob wooden skewers with the dull side down into the square Styrofoam. 
Decorate the bottom of the Styrofoam with the decorative tape. You may need to glue it down even if the tape is sticky. 

2.Start with the biggest peace of paper (6") fold the edges downwards slightly and stab the paper trough the middle into the kabob stick. Repeat this until you feel you've reached enough of a thickness (about 6-8 sheets). When placing the paper on the stick alternate the edges/points. 

Making paper Christmas Tree
3. Repeat the step above with all the smaller pieces. As you work look at you tree and decided if you need more or less paper, or if you need to press the edges slightly. 

4. When you have placed the last paper on top take a small square (about 1") of foam core board and put it on top of the kabob stick. 

5. Start decorating with glitter, ornaments, rhinestones, and anything else that you might like. Make your own little garland. Spray with snow spray and place the tree on a display. Don't forget to take a picture and share.


Paper Christmas Tree Crafting


And look how adorable these have turned out. I am going to display these for years to come. 
These are also a great gift for family members. 
Craft away!


Paper Christmas Tree- handmade with ornaments, snow, star